Digital Signage
Client:
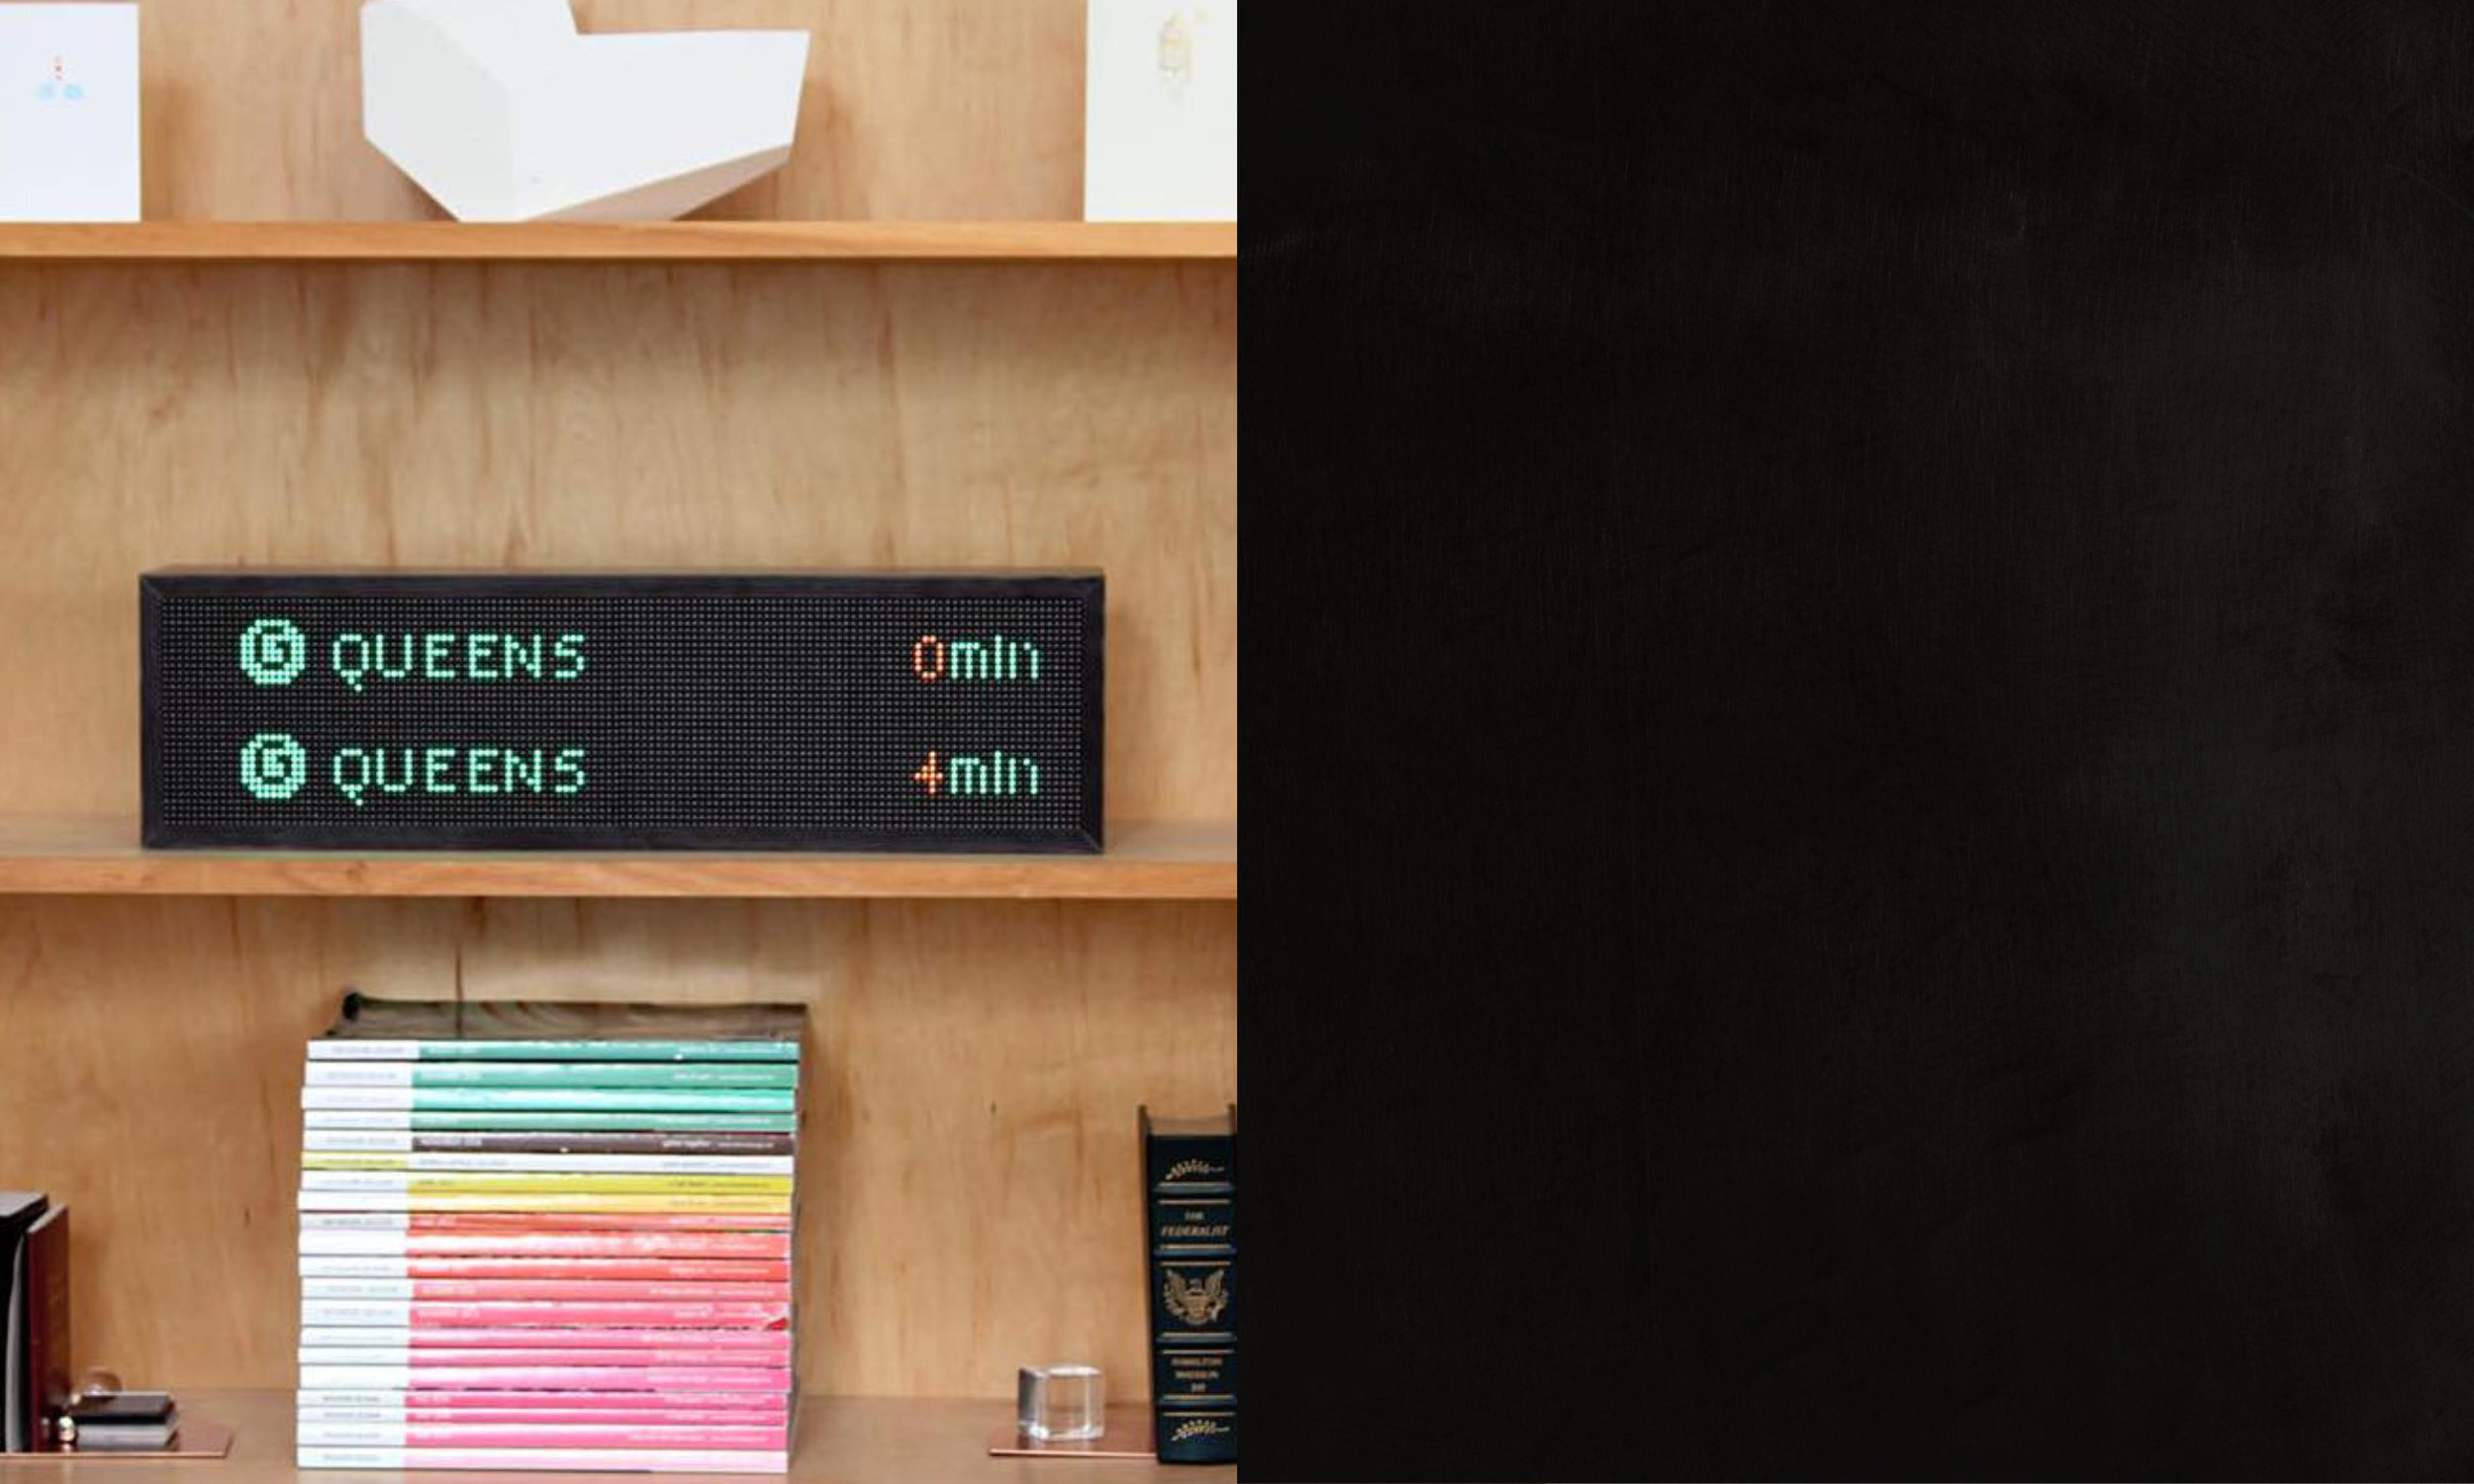
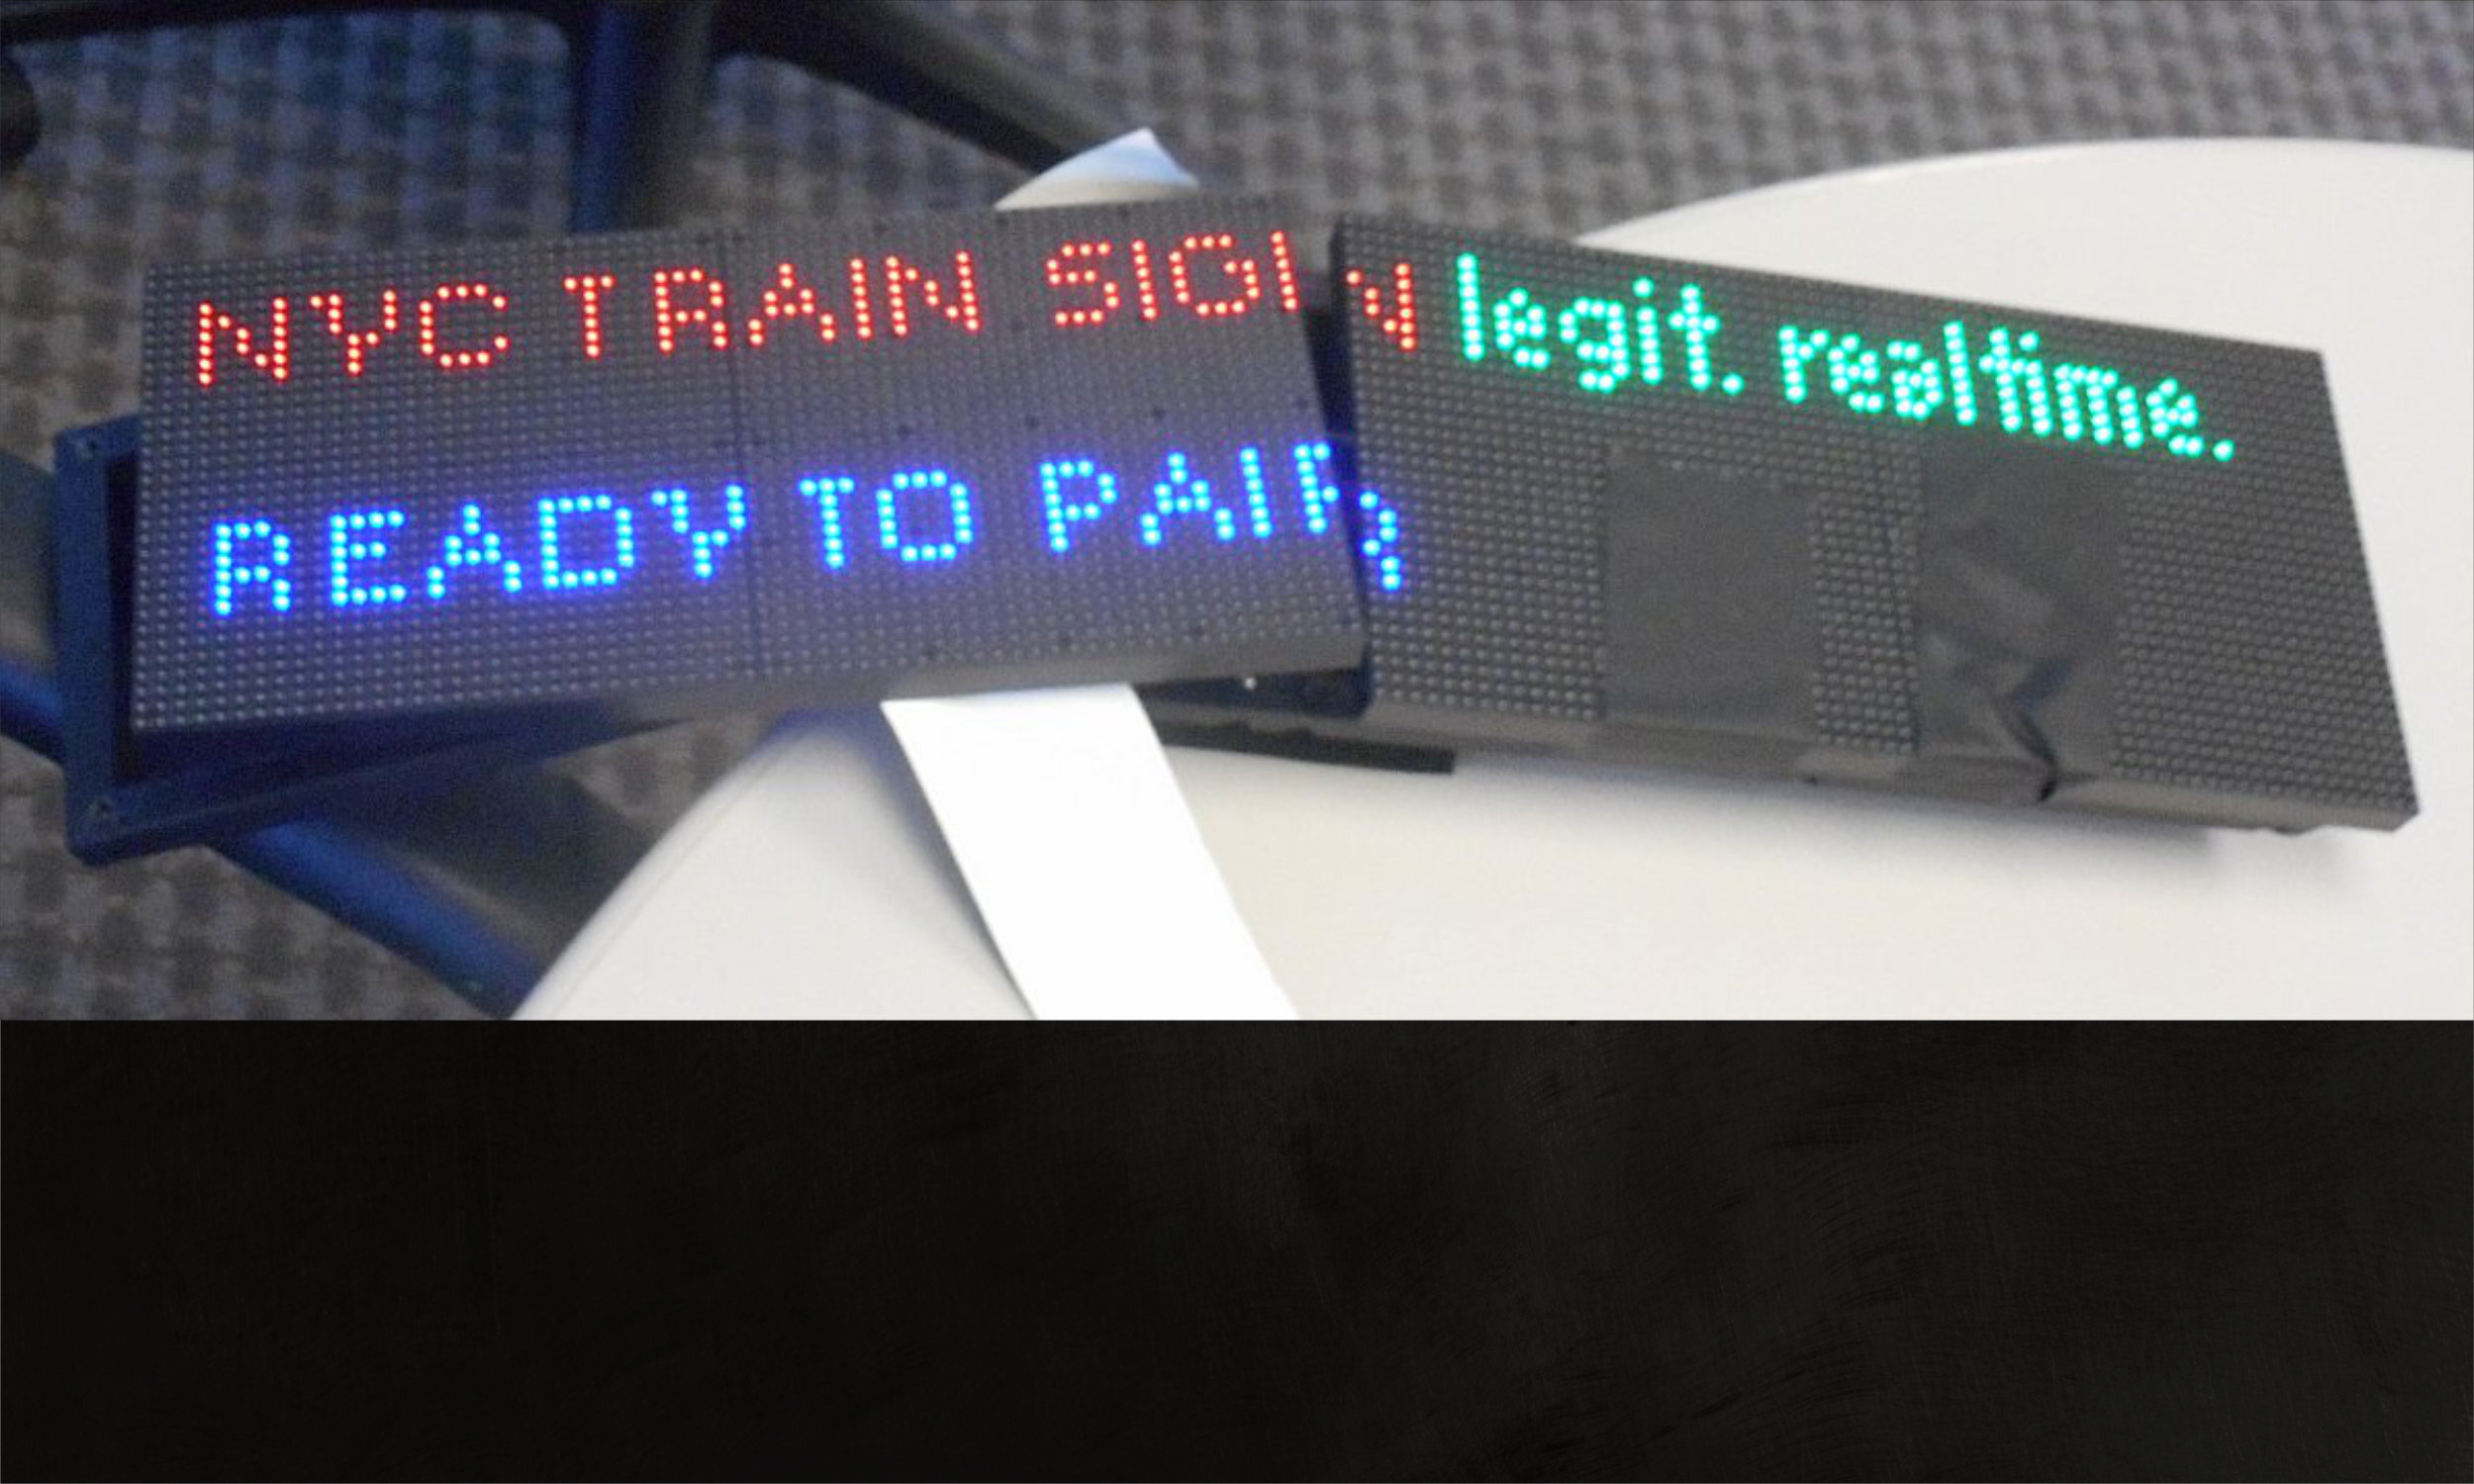
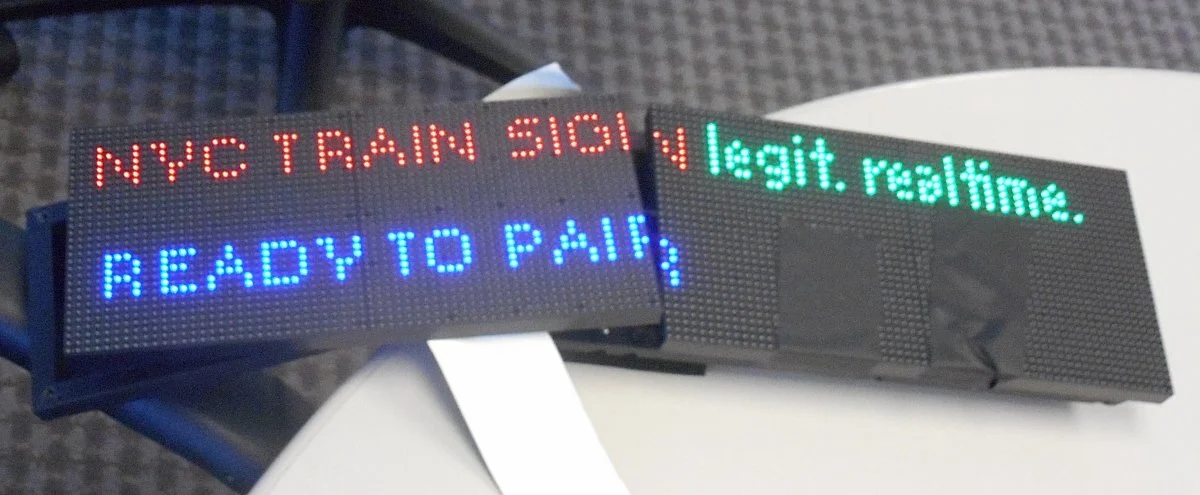
NYC Trainsign
Competencies:
PCB Layout
Linux Development with Raspberry Pi
Helping a Client Migrate a Rapsberry Pi Design for Digital Signage into Production
Some clever folks noticed that there are enough features to a Raspberry Pi that it can be a very effective tool for driving an LED array to make a low-cost, internet-connected digital sign.
The problem was how to take the design to short-run production to penetrate the initial market: The bars and restaurants near train and subway stations. The idea was to deploy these signs where patrons could see how long they had to eat or drink before their train arrived.
The result had to be a simple-to-install device that was rugged and reliable.
It was our job to take it from a solid hobbyist-grade prototype to something that could be made in quantities in at least the low hundreds to bootstrap the client’s financial position to where he was ready to do a more streamlined design suitable for a bigger production run.
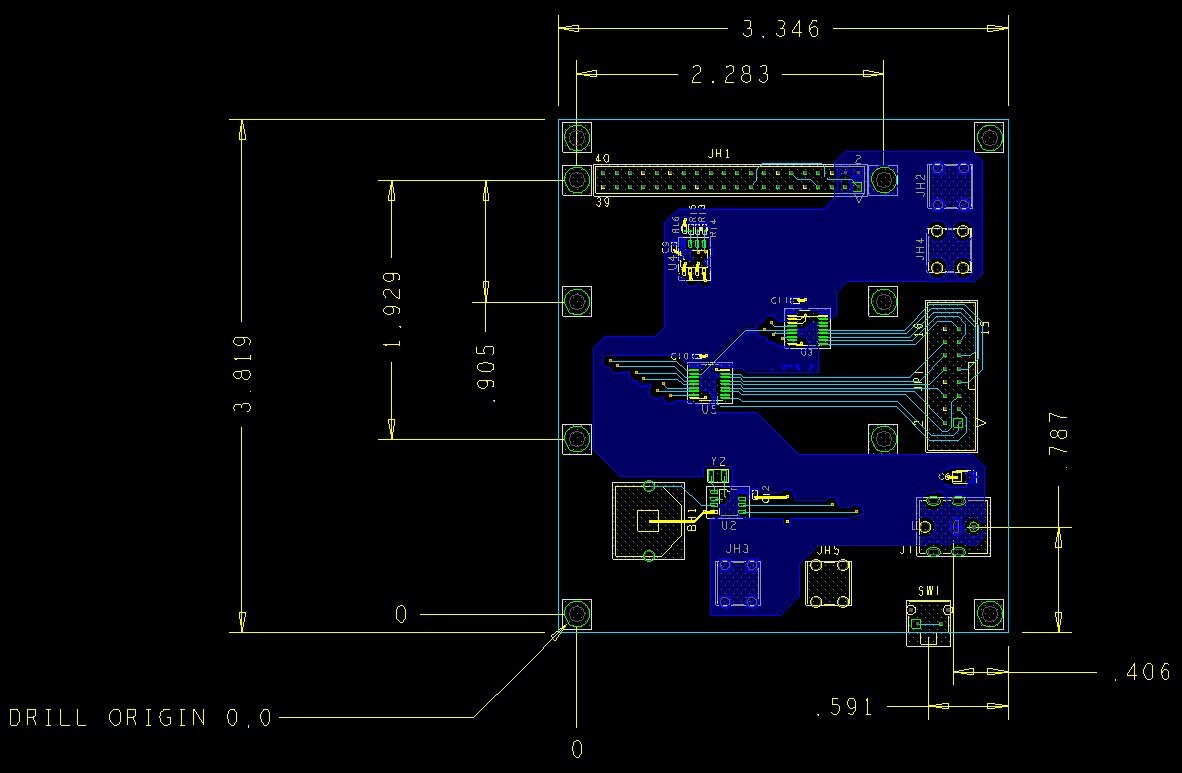
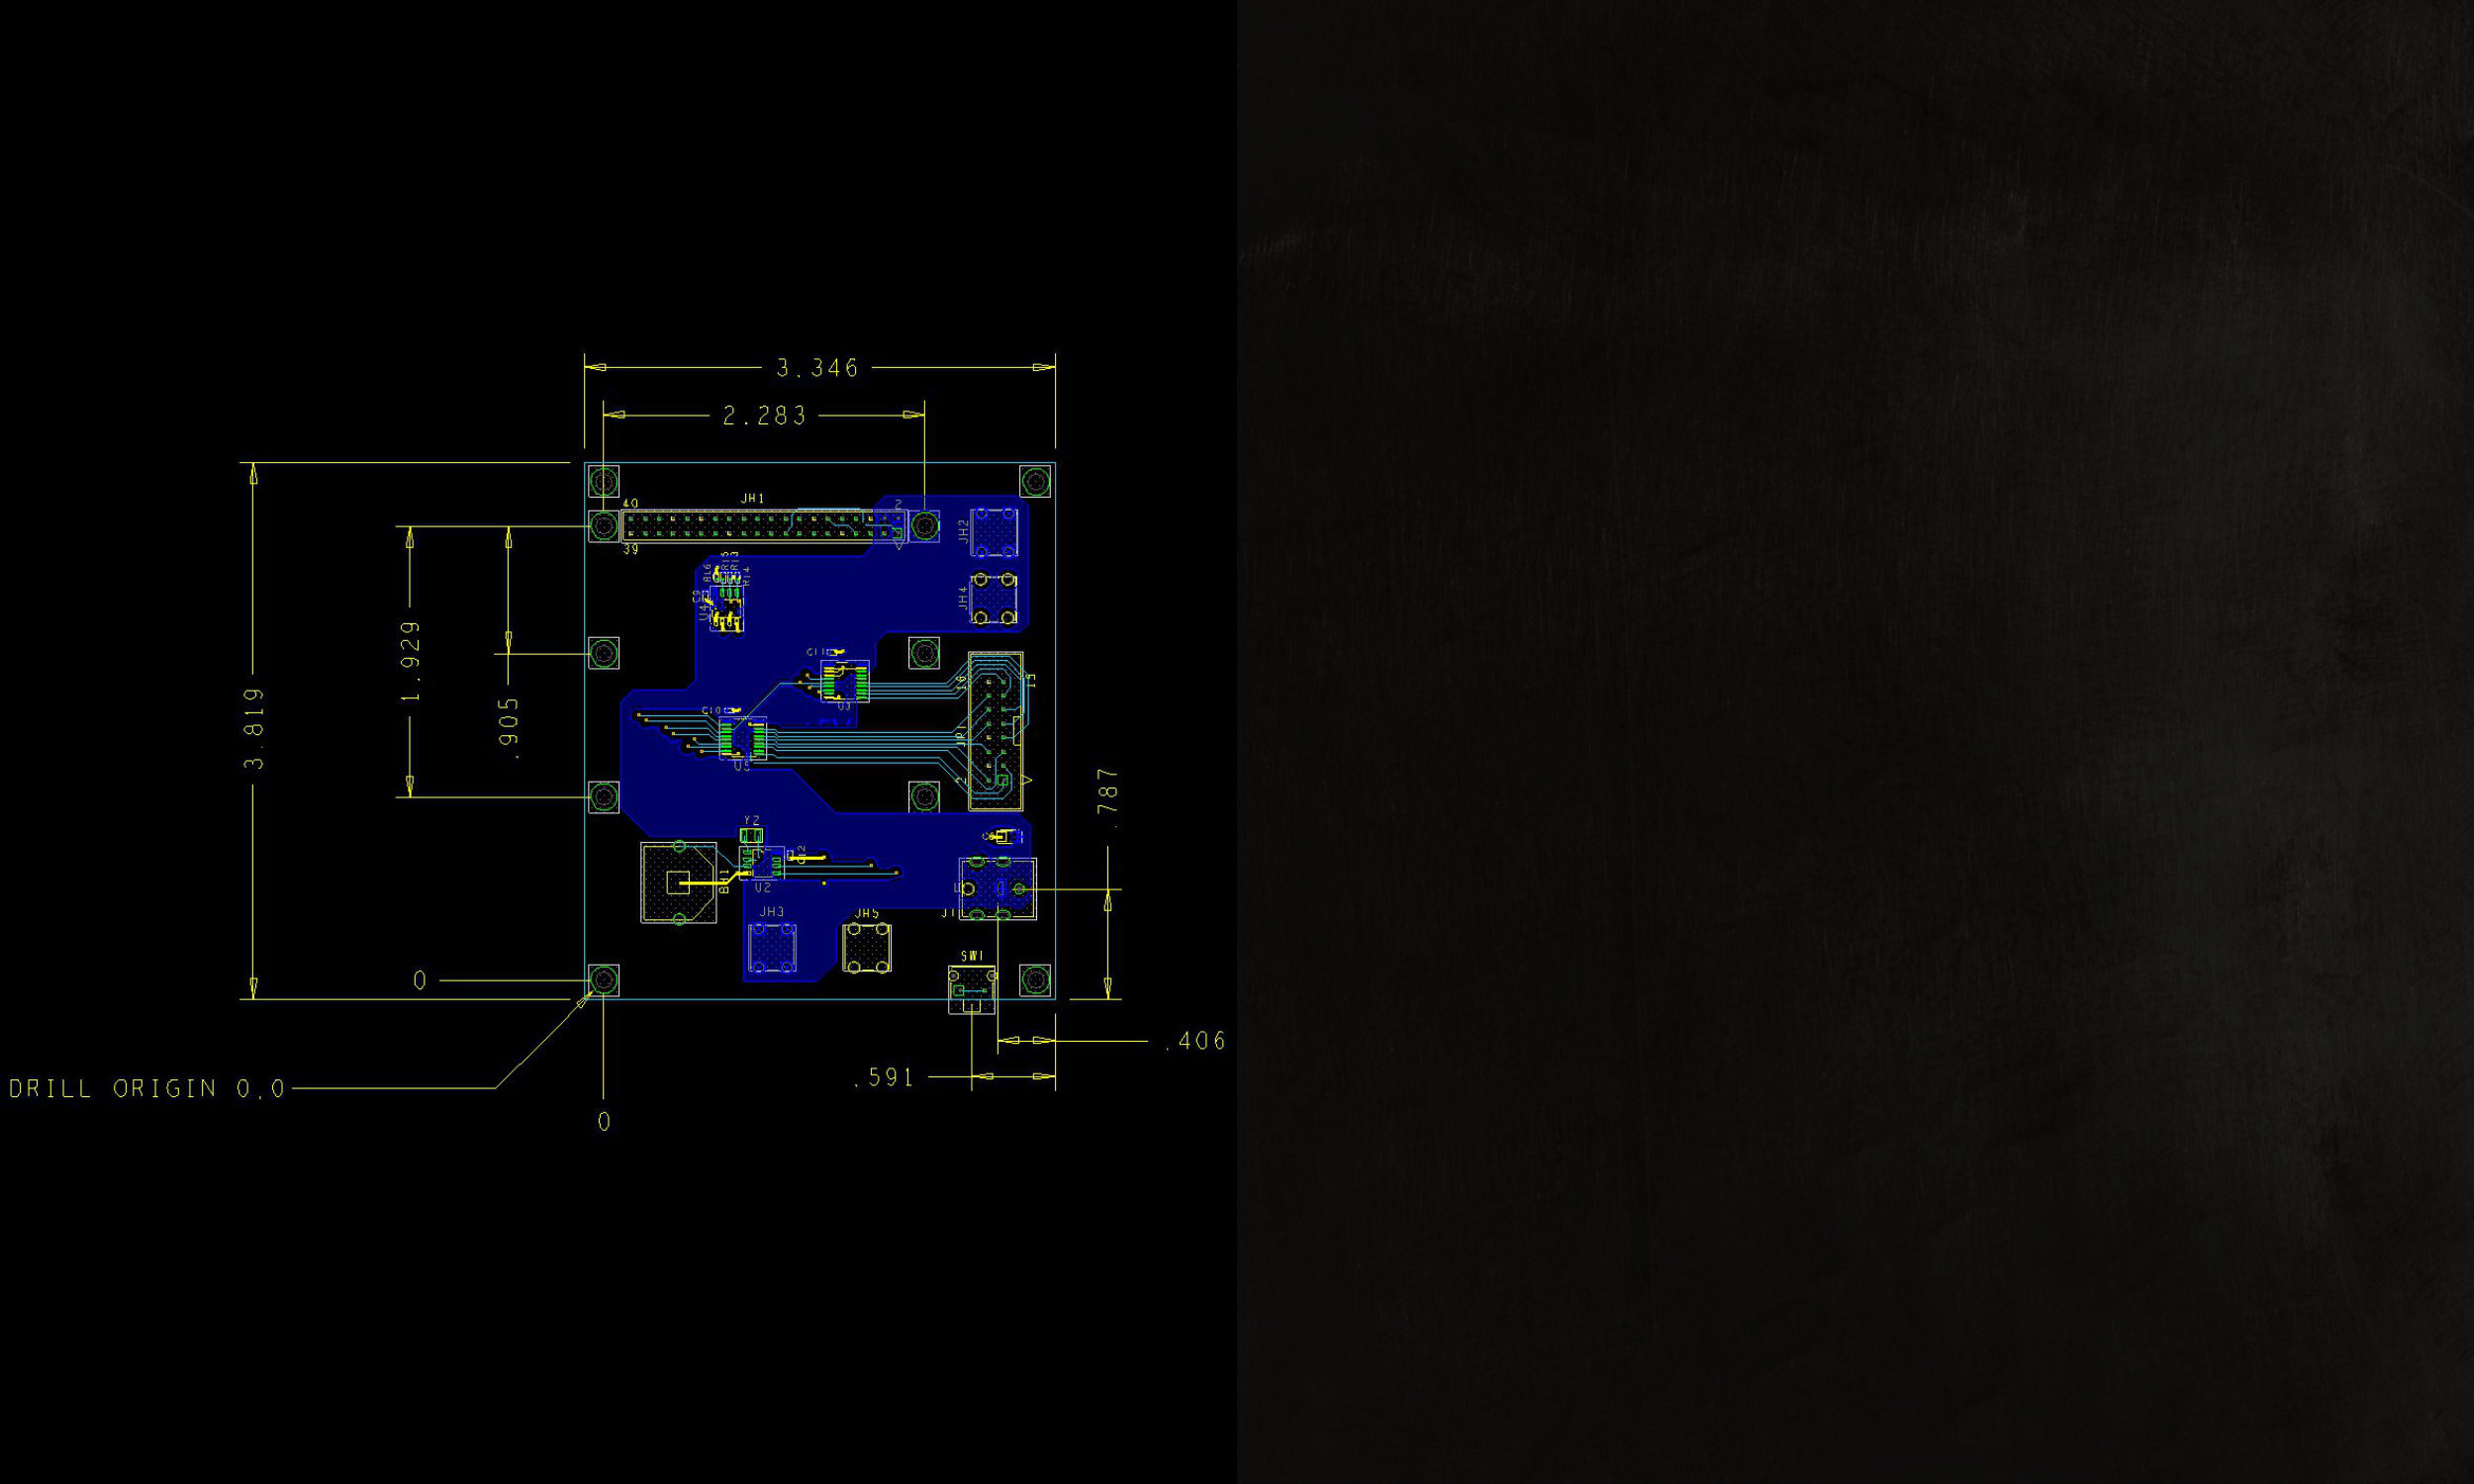
What We Did: Getting a PCB Outline to Fit the Mechanical Enclosure
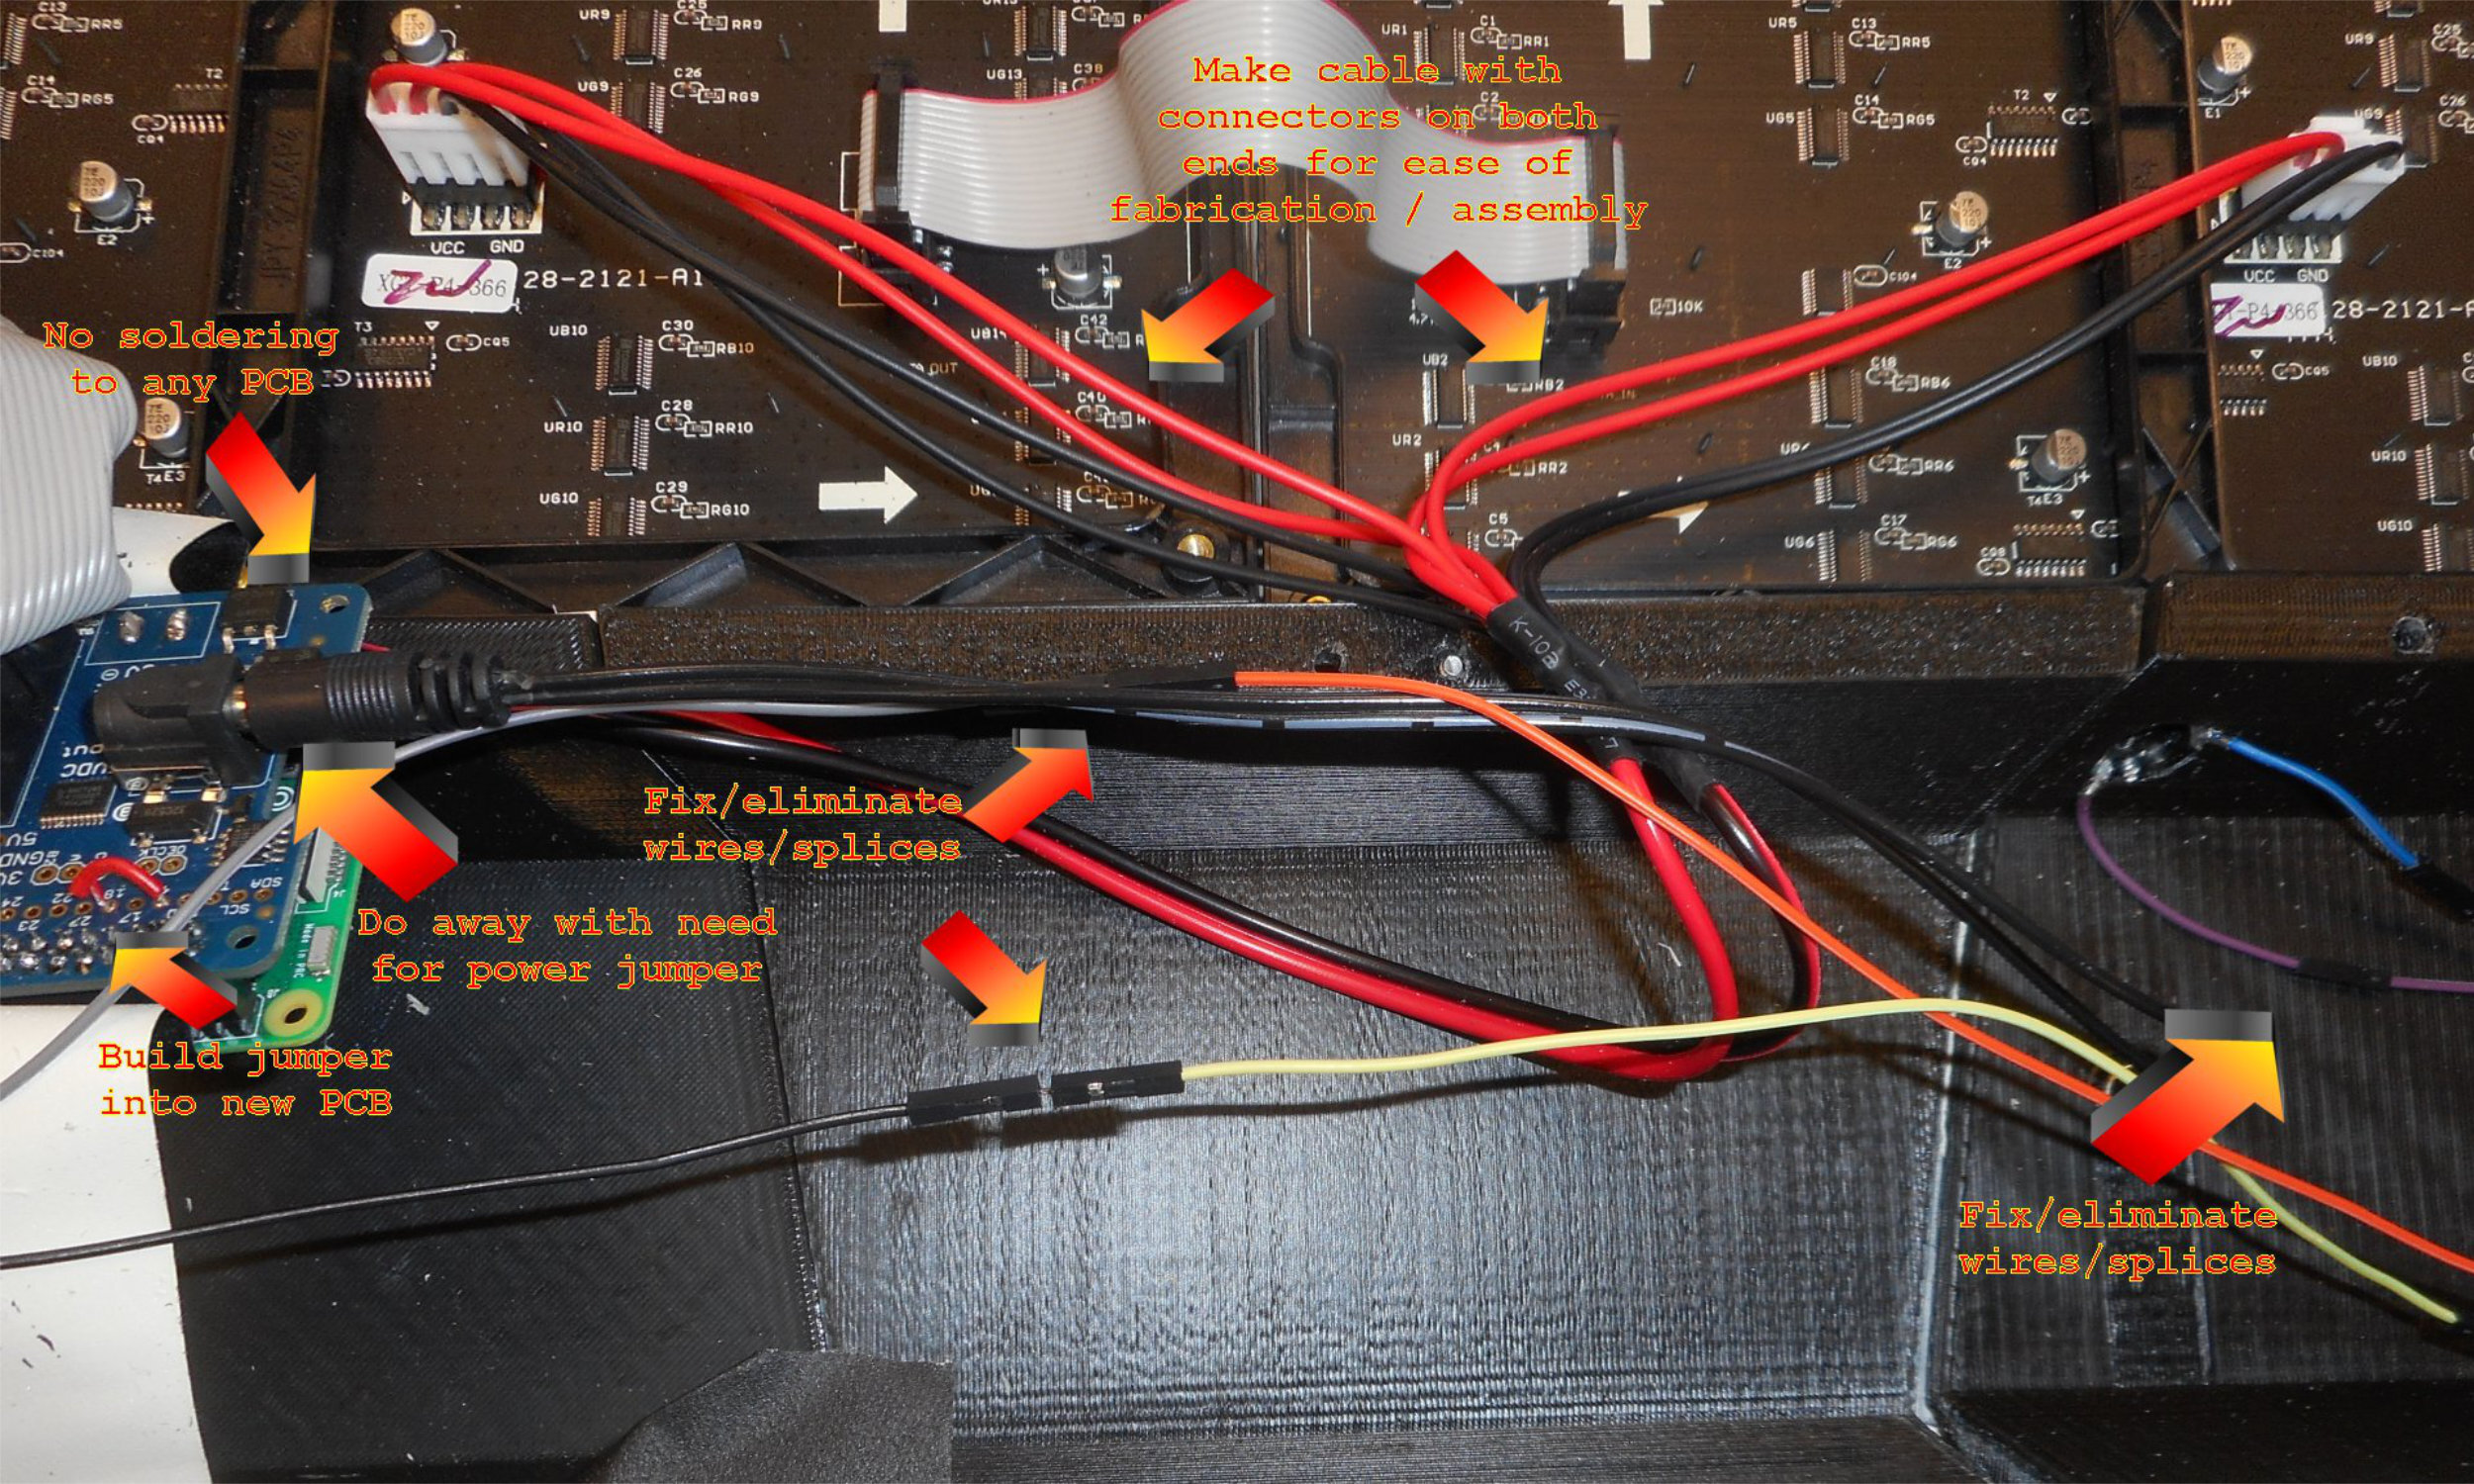
The biggest part of the problem was getting from a 3D-printed enclosure and electronics hand-cobbled onto a Raspberry Pi board to something in an injection-molded plastic housing with a PCB that fit inside and brought all the loose pieces together properly for mass manufacture.
Our mechanical engineering partners at Produktworks design did the mechanical part, and we did the PCB and internal wiring harness design.
What We Did:
As the very first prototype came to use from the client, it was a hodgepodge of cabling and loose bits that could never be manufactured correctly in any quantity. A big part of our job, beyond designing a PCB, was to tidy all this up into a single, easy-to-manufacture harness.

What We Did: A PCB into which a Raspberry Pi Could Fit
Short term, in order to get revenue, the customer’s plan was to use a Raspberry Pi as the heart of his system. Later he would do a custom board with a different processor and WiFi radio to save money and improve manufacturability. But before then, he needed to be cash-flow positive, and the Pi was the quickest way to get there.
Our job became designing the board that would fit the enclosure, would position a few switches and power jacks where they needed to be, and interface to all the I/O on the Pi.